nailboo gel polish instructions
Nailboo gel polish offers a way to achieve salon-quality manicures at home. With proper application, it can last up to four weeks; It’s a popular choice for its smooth, quick-drying, and protective qualities against damage, allowing for various creative designs.
What is Nailboo Gel Polish?
Nailboo gel polish is a specialized type of nail coating known for its durability and long-lasting shine, offering an alternative to traditional nail polish. It is applied in layers, each requiring curing under a UV or LED lamp to harden and set. Unlike regular polish, Nailboo gel polish provides a strong, chip-resistant finish that can endure for several weeks. This type of polish is versatile, allowing for various nail art designs, and can be used on both natural nails and artificial extensions. It is also popular for its ability to protect nails from damage and breakage. The application process, while straightforward, requires specific steps and tools for optimal results. Proper techniques ensure a smooth, professional-looking manicure every time.
Essential Tools and Preparation
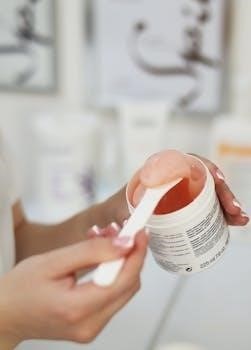
To apply Nailboo gel polish, you’ll need a UV/LED lamp, base coat, color coats, top coat, nail file, buffer, cuticle oil, pusher, and lint-free wipes. Proper preparation is crucial for long-lasting results.
Required Materials for Nailboo Gel Polish Application
For a successful Nailboo gel polish application, you’ll need a few essential tools and products. First, a UV/LED lamp is necessary for curing the gel. You’ll also need a gel base coat to create a bonding layer, your chosen Nailboo gel color polish, and a gel top coat for sealing and shine. Additionally, gather a nail file and buffer to shape and prepare the nail surface. Don’t forget cuticle oil and a cuticle pusher for proper nail care. Finally, lint-free wipes and alcohol are needed for cleaning. These materials will help achieve a long-lasting, professional-looking manicure at home. Having these items ensures a smooth and effective application process.
Prepping Your Nails⁚ A Crucial First Step
Proper nail preparation is essential for a long-lasting gel manicure. Begin by ensuring your nails are clean and dry, avoiding water exposure for at least an hour beforehand, as absorbed water can alter the nail’s shape. Remove any existing polish and trim and shape your nails to your preference. Next, gently push back your cuticles and lightly buff the surface of your nails to eliminate any natural shine. This step is vital for better adhesion. Finally, cleanse your nails with alcohol to remove oils and dust. A clean and prepared nail bed is the foundation for a flawless Nailboo gel polish application.

Step-by-Step Application Guide
Applying Nailboo gel polish involves a precise process. It includes applying a base coat, color coats, and a top coat, with curing under a UV/LED lamp after each coat to ensure proper hardening and longevity.
Applying the Base Coat and Curing
Begin by ensuring your nails are clean, dry, and prepped, free from any oils or dust. Apply a thin layer of Nailboo base coat, using a rubbing motion for best adhesion. Make sure the base coat does not touch the skin. If any mistakes happen, clean it with an alcohol wipe. Cure the base coat under a UV/LED lamp for 60 seconds. The base coat will remain slightly sticky after curing. This is normal and essential for the next layer to adhere properly. Avoid exposure to water for at least one hour before starting the application process, as absorbed water can affect the shape of the nail.
Applying Color Coats and Curing⁚ Achieving the Desired Opacity
After applying and curing the base coat, apply a thin, even layer of your chosen Nailboo color gel polish over the base coat. Ensure the polish doesn’t touch your skin; clean any mistakes with an alcohol wipe before curing. Cure the first color coat for 60 seconds under a UV/LED lamp. Apply a second thin coat of color to achieve the desired opacity and cure again for another 60 seconds. It’s recommended to use two to three thin coats, curing each layer, for the best results. Remember that each layer should be thin to ensure proper curing and to avoid clumping.
Applying the Top Coat and Curing
Once you’ve achieved your desired color opacity, it’s time to apply the top coat. Apply a thin, even layer of Nailboo’s no-wipe top coat over the cured color layers. The top coat helps to self-level and add a glossy finish. Ensure the top coat covers the entire nail surface, sealing the color underneath. Cure the top coat under a UV/LED lamp for 60 seconds. This final curing step is crucial for a long-lasting, chip-resistant manicure. The top coat will provide a smooth, durable, and shiny finish to your gel manicure. Avoid touching the nails before they are completely cured.
Tips for a Long-Lasting Manicure
To ensure your Nailboo gel manicure lasts, avoid water exposure an hour before application, apply thin coats, and properly cure each layer. This minimizes chipping and peeling for up to four weeks.
Avoiding Common Mistakes⁚ Preventing Chipping and Peeling
Many issues with gel manicures, such as chipping and peeling, stem from common application errors. New users might find their manicures don’t last as long as expected. One frequent mistake is not properly prepping the nails; ensuring they are clean, dry, and free of oils is crucial. Pushing back cuticles and buffing the nail surface are essential steps for proper adhesion. Another common error is applying gel polish too thickly. Multiple thin coats, cured correctly, are better than one thick coat. Furthermore, make sure to cap the free edge of your nails with each layer of polish. If the gel touches your skin, clean it before curing. Avoid water exposure an hour before application, as this can affect the manicure’s longevity. Practice makes perfect, and addressing these common mistakes will lead to a more durable, flawless manicure.
Proper Curing Techniques for Optimal Results
Correct curing is paramount for a long-lasting gel manicure. Each layer of Nailboo gel polish, including the base coat, color coats, and top coat, must be fully cured under a UV/LED lamp. Typically, each layer needs about 60 seconds of curing. Ensure your lamp is working correctly and position your hand properly under the light for even curing. It’s normal for the base and color coats to remain slightly sticky after curing; this stickiness helps subsequent layers adhere. Insufficient curing can lead to peeling and chipping. Always follow the recommended curing times. Remember, thin layers are better; too thick of a layer may not cure properly. Using the correct curing technique ensures that your manicure is strong, durable, and maintains its glossy finish.

Advanced Techniques and Special Effects
Nailboo offers magnetic gels for unique cat-eye designs. Gel polish can also be combined with dip powder for added strength and creative looks. These advanced methods allow for personalized, trendy manicures.
Using Magnetic Gel and Creating Unique Designs
Nailboo’s magnetic gel collection opens up a world of creative possibilities for your manicures, enabling you to achieve captivating velvet and cat-eye effects. To begin, ensure the bottle is well-mixed by rolling it between your hands; this step is crucial for distributing the magnetic particles evenly. Apply one layer of your chosen magnetic gel shade to each nail individually. Work one nail at a time to ensure the magnetic effect is achieved before curing. After applying the magnetic gel, use a magnet to manipulate the metallic particles, creating the desired effect. Hold the magnet close to, but not touching, the nail for several seconds. Once you are satisfied with the design, cure the gel under a UV/LED lamp. This technique is versatile, allowing you to experiment with various patterns and create personalized, trendy nail art. Remember to cure each layer as directed for the best results.
Combining Gel Polish with Dip Powder
Combining Nailboo gel polish with dip powder is an excellent way to add depth and creativity to your manicure. Gel polish can be used on top of dip powder manicures to create unique designs and art. After completing your dip powder application, ensure the surface is smooth and dust-free. You can then apply a layer of gel base coat, cure it, and then proceed with your gel polish color of choice. Remember to apply thin coats of the gel polish, curing each layer before applying the next. This method allows for the strength of dip powder with the versatility of gel polish. You can also use gel top coat for a glossy and long-lasting finish. This combination provides a long-lasting and durable manicure with endless creative options. Be sure to cap the free edge with gel to prevent chipping and peeling.
Troubleshooting and FAQs
This section addresses common issues such as chipping and peeling, offering solutions for a long-lasting manicure. We also provide answers to frequently asked questions about Nailboo gel polish application and care.
Addressing Common Issues and Concerns
New users of gel nail polish may experience issues such as premature chipping or peeling, often due to small application mistakes; It’s essential to avoid water exposure for at least an hour before application, as absorbed water can affect the nail plate. Ensure the gel polish does not touch the skin, and clean any mistakes with alcohol before curing. If your gel polish is lifting, proper nail preparation is key⁚ gently buff the nails to remove natural shine and cleanse with alcohol. Using thin layers of gel polish and curing each layer properly is also critical for preventing these issues. Remember, practice leads to flawless, long-lasting manicures.
Nailboo Gel Polish FAQs
Many users often wonder if they can use other brands’ base and top coats with Nailboo gel polish. While it’s possible to use other gel products, Nailboo cannot guarantee the results. It is recommended to use two to three thin coats of color gel, curing each layer in between. Gel polish can be used on natural nails or glue-on tips. Nailboo’s gel polish is designed to last up to four weeks with proper application, offering a longer wear time compared to some hybrid options. Additionally, gel polish can be used to create unique designs over dip powder manicures, providing versatility in nail art.


Leave a Comment